Platinum labware is usually exposed to harsh environments that can considerably reduce the lifespan of the product, as well as the accuracy of the measurement processes associated with it. This article provides a short summary on how to look after the labware to ensure optimum lifetime.
Platinum has high chemical resistance even at elevated temperatures and hence it is considered as one of the least reactive metals. It is resistant to acid attacks and cannot be oxidized in air at any temperature. These properties make platinum the ideal metal for wet chemical digestions or for preparation of fusion samples. Conversely, many substances can attack platinum and combine with it at relatively low temperatures.
Conditions to Avoid
Occasionally, platinum crucibles can suffer holes or cracking during sample ignitions or fusion processes. This is a bothersome expense for the analyst and can also damage the fusion furnaces because of leaking molten mixtures. The failure of the crucible is not essentially caused by poor metal quality or manufacturing defects. These detrimental effects are caused by the alloying and chemical reaction of the platinum crucible with reduced metals as a result of wrong procedures or a failure to maintain oxidizing conditions during fusion processes.
The harmful effects of different substances can differ significantly. In certain cases, a platinum crucible can suffer substantial reaction and alloying with a certain metal over an extended period of time without significantly limiting its usability. Besides cross contamination of samples caused by leaching, the crucible can still sustain its physical integrity. In other cases however, even a few hundredths of a milligram of a different type of metal can totally damage a platinum crucible.
Cr, Co, Ni, Mn, Cu, Zn, and Fe are metals that will easily respond to platinum alloys at elevated temperatures, but they do not considerably cause damage to the crucible unless the contamination is extremely high or the crucible is subjected to temperatures above the suggested operating conditions i.e. 1200 °C. These metals tend to subsequently leach out of the platinum alloy and contaminate other samples. Indication of high contamination will be tiny cracks in the lower walls or base of the crucible.
Metals like Bi, Pb¸ Sb, Sn, and Ag will readily alloy with the platinum crucible even at relatively low temperatures and reduce the platinum’s melting point causing holes. The usual cause of failure is when these metals are present during low temperature and the crucible is subsequently heated to fusion temperature, causing the platinum to melt. Even a small amount of these metals is more than sufficient to cause extensive ‘corrosion’ to the base and inner walls of the crucible, leading to destruction.
Non-metals like P, S, Si, As, and SiC can also have devastating effects on platinum alloys. They also form low melting alloys with platinum but their effect is extremely destructive. Phosphorus and silicon, in particular, have a muscular affinity for the platinum metal, forming alloys along the grain boundaries. This alloying effect happens very quickly which eventually results in cracks.
On examining the crucible crack under a microscope, the metal will seem to have a crystalline structure where the metallic grain has ‘unzipped’. The crucible will simply fall apart if the contamination is more severe. This kind of contamination is believed to be the most common cause of platinum Labware failure, in spite of the additional care on the part of the operator. For instance, a temporary lack of oxidizing conditions or minute amounts of organic material is sufficient to reduce silicon dioxide to the elemental form which rapidly reacts with the platinum.
Process Summary
The steps given below provide comprehensive instructions on how to follow the XRF Scientific Platinum Care process:

Handling
| Tools: |
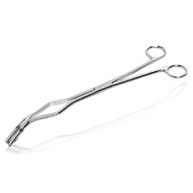
Platinum tipped tongs |
| Consumables: |
None |
| How often? |
Every time |
Platinum tipped tongs must be employed to prevent contamination when picking up a hot mould / crucible. In order to prevent base contamination and corrosion, platinum Labware should be placed on clean surface at all times. In addition, a clean sheet of paper is a good substitute.
Fusion

| Tools: |
Fusion machine |
| Consumables: |
Ammonium Iodide tablets or
Flux containing oxidants and release agents |
| How often? |
Every fusion run |
The oxidizing conditions should always be maintained during the fusion process to prevent metal formation, especially when fusing reducible matter. This can be accomplished by either adding an oxidant to the sample/flux mixture or by pre-oxidizing the sample before fusion. If any metals such as Si, S, P, As, Sn, Sb, Pb, Zn, Cu, Ni, Cr, and Fe are present for instance in the sample, they will immediately react with the platinum crucible and usually form “corrosion” and brittle alloys.
The crucible will consequently fail with repeated cooling and heating. When releasing a bead from the mould, the addition of ammonium iodide tablets to the fusion process ensures the best result and also lowers sticking/release-related damage. This is especially effective where the tablet is added after the initiation of the process. On the other hand, a release agent can be added to the flux/sample mixture before fusion. Direct fusions should not be carried out with cyanides, nitrates, caustic alkalis or nitrides in platinum labware.
Cleaning
| Tools: |
Ultrasonic bath, drying oven, platinum tipped tongs, crucible cleaning holder, mould cleaning holder |
| Consumables: |
Citric acid |
| How often? |
Every fusion run |
Moulds and Crucibles should be placed in a custom holder to maximize cleaning effectiveness and to ensure that there is no cross contamination. If citric acid (20%) is used in an ultrasonic bath set to vibrate at 50 °C for 10 minutes, any adhering flux can be removed. The citric acid solution should be regularly replaced, especially if the solution is viscous or dark yellow. It is important to dry the labware by placing it in a drying oven or by employing a clean air stream.
Weighing
| Tools: |
Weigh scale |
| Consumables: |
none |
| How often? |
Daily |
It is necessary to measure the weight of the labware daily. This is the best indicator that the product has attained a point that it should be remade. The mould should be returned to the manufacturer for remake, if it has reduced in weight by more than 10% of specification due to polishing and/or usage.
Inspection
| Tools: |
Magnifying glass/ microscope |
| Consumables: |
None |
| How often? |
Daily |
The moulds should be inspected for blemishes, scratches and holes, and if needed, should be polished to restore an unmarked mirror surface. In addition to lowering the probability of sticking beads, polishing will also renew the mould surface. The moulds should be tested for straight edge reflection after each polishing session so that the surface remains flat. Crucibles must be checked regularly for integrity of shape and/or alloy ‘corrosion’. If crucibles are damaged or exhibiting cracks/corrosion, they should be returned to the manufacturer for remake.
Polishing

| Tools: |
Polishing jig |
| Consumables: |
Polishing oil, 1000 grit paper, soft tissue, 14, 8, 3 micron diamond paste, felt pads |
| How often? |
Based on inspection |
Polishing is designed to rectify minor blemishes and distortions to the surface. Remake is required for major structural issues. The following process should be followed, when polishing is needed:
- The mould must be placed in a mould polishing jig and screwed on the retaining cap.
- The mould polishing jig must be placed into position by screwing it onto the polishing lathe spindle.
- It must be ensured that the polishing jig is firm by holding the shaft steady with the push rod.
- Remove the push rod from shaft.
- The polishing lathe should then be started and adjusted to the speed of 60%.
- Some polishing oil should be lightly sprayed onto the 1000 grit paper.
- 1000 grit paper should be used to lightly prepare the surface, then clean the surface with a soft tissue.
- About 3 to 4 mm of the 8 micron diamond paste should be squeezed onto some clean felt pad and pressed onto the mould surface before starting the polishing machine. This will reduce the diamond paste from ‘flicking’ off the polishing surface. The polishing machine should then be started and the felt pad be introduced to the mould surface. The polishing oil should not be used at this stage. A circular motion with a backwards and forward motion across the surface of the mould should always be used and equal effort should be made on the center and outside of the mould while the polishing machine is spinning.
- A small amount of oil should be sprayed onto the mould and the felt pad should be reintroduced. The oil will thin out the diamond past, giving a finer finish and will be easier to remove fully using a soft tissue while the polishing machine is turning.
- As soon as the 8 micron diamond paste is removed, stages 8 and 9 should be repeated using diamond paste and a new felt pad. Once again, this should be completed by cleaning with a soft tissue.
Note
If diamond paste or grit paper is used when “working” the surface of the mould, it has to be ensured that equal attention is given to the center of the mould as speed differences may arise as one moves outwardly towards the edge. In order to maintain good release of glass disks, the felt pad should be held perpendicular to the bevelled surface during the polishing process and clean up as needed.
At the start of the diamond paste stages, polishing oil should not be used as it lowers its cutting effectiveness, requiring more effort and diamond paste. However, there is no need to apply any excessive pressure, as the felt pads and the grit paper can do the task by applying light but firm pressure. If a ‘wobbling’ effect is observed while applying the felt pad, it indicates that too much pressure is being applied. Extreme care should be taken in between stages so that the abrasive compounds are not cross contaminated.
The 1000 grit paper, the 3 micron and the 8 micron polishing media should be kept apart from each other. This can be also minimized by cleaning the mould surface completely with a clean soft tissue. If a finer mould surface finish is needed, the polishing process can then include a three stage diamond paste procedure, that is, 14 µm – 8 µm – 3 µm.

This information has been sourced, reviewed and adapted from materials provided by XRF Scientific.
For more information on this source, please visit XRF Scientific.