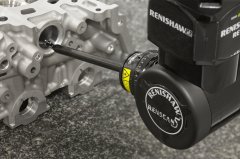
Renishaw has added a new probe option for its revolutionary REVO five-axis measurement system, which for the first time, allows surface finish inspection to be fully integrated within CMM measurement routines.
 REVO® surface finish probe
With a measurement capability of 6.3 to 0.05 Ra, the SFP1 surface finish probe provides a unique 'single platform' that will eliminate the need for hand-held sensors, or the necessity to move parts to costly dedicated surface finish measuring machines, reducing labour costs and inspection lead times. CMM users will now be able to automatically switch between part scanning and surface finish measurement, with analysis all contained in a single measurement report.
High quality surface finish data
As a fully integrated option for the REVO 5-axis measurement system, users of the SFP1 surface finish probe will benefit from a range of powerful features that will boost inspection speed and flexibility.
The probe incorporates a C axis, which combined with the infinite positioning capability of the REVO measuring head and a choice of stylus holders, allows the probe tip to be automatically orientated to any angle to suit the part, ensuring that the highest quality surface data is acquired. The SFP1 is supplied with two dedicated stylus holders, the SFS-1 straight stylus and SFS-2 cranked stylus, which are selected under full measurement program control using the REVO system's modular rack system (MRS). This enables flexible access to component features combined with the consistency of a fully-automated CNC methodology.
Automated surface finish probe calibration
Calibration of the sensor is also automated and carried out within a CMM software programme. A new surface finish calibration artefact (SFA) is mounted on the MRS rack and is measured using the SFP1 probe. Software then adjusts parameters within the probe in accordance with the artefact's calibrated value.
A skidded probe type with a 2 µm (0.000079 in) tip radius diamond stylus, the SFP1 surface finish probe outputs Ra, RMS and raw data formats to the metrology application client software via Renishaw's UCCServer software using the I++ DME protocol. The raw data can subsequently be presented to specialist surface analysis software packages for further detailed reporting.