A material’s hardness relates to its mechanical resistance when subjected to mechanical indentation by another harder body. Diamond is considered the hardest natural material and is typically used for the hardness testing machine indenter. Hardness differs in definition from strength, which is the material’s resistance to deformation and separation.
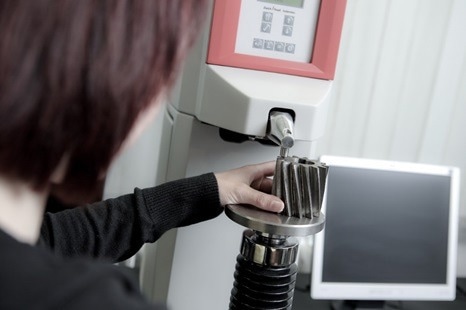
Image Credit: ZwickRoell GmbH Co. KG
Hardness is not necessarily an intrinsic physical property of a material. However, there are hardness ranges in which numerous materials are encapsulated. Hardness can be altered with the application of heat, meaning that a workpiece’s hardness value is augmented after being exposed to a heat treatment process.
The hardness value that a hardness test determines can be dependent on the test method selected, the length of time the indenter is in the material, the test load the indenter applies, the geometry of the indenter, and the geometry of the workpiece.
Methods that apply static force are the most commonly used hardness tests for metals. Measurements are either recorded at the indentation depth or indentation size made by the indenter. When applying static methods during hardness testing, a differentiation is determined between depth measurement and optical measurement methods.
Depth measurement methods can measure the residual indentation depth of the indenter. The Rockwell method is the only depth measurement method that has been standardized (see ISO 6508, ASTM E18). There are other non-standardized depth measurement methods: i.e., Brinell and Vickers for depth (HBT, HVT).
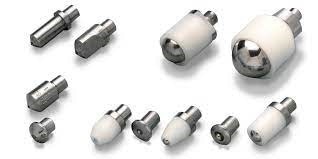
Rockwell hardness testing indenters. Image Credit: ZwickRoell GmbH Co. KG
The residual indentation size of the indenter can be measured using optical measurement methods. Among the standardized optical hardness testing methods are the Brinell hardness test (ISO 6506, ASTM E10), the Knoop hardness test (ISO 4545, ASTM E92, ASTM E384), and the Vickers hardness test (ISO 6507, ASTM E92, ASTM E384).
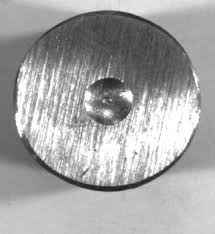
Brinell indentation. Image Credit: ZwickRoell GmbH Co. KG
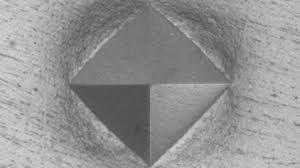
Vickers indentation. Image Credit: ZwickRoell GmbH Co. KG
Alternatively, methods that use dynamic force can also be applied within the range of hardness testing. Among these, for example, is the Leeb rebound hardness test method, which uses a ball indenter and measures the relative rebound height.
Today, hardness testing is among the most commonly used methods in mechanical materials testing, particularly for metals.
This testing method can be applied to determine qualitative relations to other material properties (e.g. stiffness strength and density) or the material behavior when subjected to specific stresses (e.g. abrasion resistance).
Alternatively, hardness testing is a relatively simple and fast method; it results in relatively small superficial damage on the specimen surface. It also offers a quality control option (incoming and outgoing goods inspection). An extensive range of specimen geometries can also be tested with the application of the hardness testing method.
Hardness testing is an essential tool when it comes to differentiating various materials, as well as being an essential aid for analyzing, developing, and improving materials and technologies across the entire framework of crucial research fields (materials science, materials engineering, material diagnostics).
It is used to establish the characteristic values (hardness values), which are vital for the material’s application in industrial settings (whether a material is suitable for a technically relevant component), for the differentiation of materials (e.g. mix ups of materials), their viability in control processes concerning the scope of quality assurance (incoming and outgoing goods inspection), and for clarifying damage situations (damage analysis).
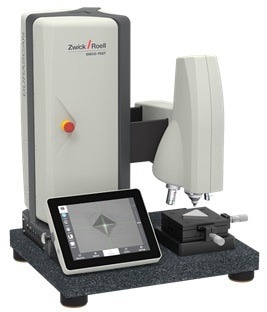
Vickers hardness tester. Image Credit: ZwickRoell GmbH Co. KG
The hardness testing methods used frequently across the technology field are separated into methods with static and dynamic force applications. When testing the hardness of metals, static forces are predominantly used, and the test load is slowly increased. This indicates the smooth application of a force without abrupt movements for a minimum time, as determined by one of the standards (illustrated in the graph below). Conversely, the test load is applied abruptly to dynamic methods, subjecting the specimen to an instant impact load.
Hardness tests on metals can be differentiated in line with the following criteria:
- The indenter’s shape (spherical, pyramid, or cone)
- Size of the test load applied to the specimen and type of evaluation
- Indenter material (hardened metal or diamond)
- Measurement of the indenter depth or the indentation size that the indenter creates
Different main loads (test forces) will be used in hardness testing, depending on the required application. Conditional on the size of the main load applied to a specimen when conducting the hardness test, differentiation is made between micro, low-load, or macro hardness testing within ISO standards.
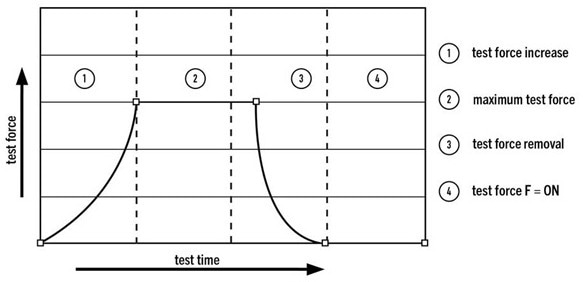
Image Credit: ZwickRoell GmbH Co. KG
In the macro range (traditional hardness range), tests are conducted using large test loads ≥ 5 kgf, which also correspondingly produce large hardness indentations on the test pieces. Hardness test methods used in the macro range include Brinell, Vickers, and Rockwell.
When the test load falls between an interval of 0.2 kgf and 5 kgf (test load ≥ 0.2 kgf and < 5 kgf), the hardness testing is in the low-load range.
The most commonly used low-load method is the Vickers method. Low-load hardness testing is predominantly used when testing small parts, thick coatings, and materials with low physical hardness.
Small test loads < 0.2 kgf that produce tiny indents on the test pieces are typically used for micro hardness tests (the most commonly used method is Vickers). Hardness tests in the micro range may be applied to establish how hard the surface of thin coatings is or, for example, the hardness of individual crystallites or inclusions.
Hardness testing machines are subjected to the same rigor as most testing equipment and the machine components may become misaligned when undergoing repeated use. Therefore, regular inspection and calibration are essential to ensure the equipment can be deemed reliable.
Two main types of calibrations are generally applied to hardness testers: direct and indirect. Direct calibration requires that each component of the hardness tester undergoes a verification process, such as calibrating force, measuring device accuracy, indenter dimensions, and the speed and timing of the indentation cycle.
Indirect calibration necessitates checking the hardness tester against certified hardness test blocks representative of the various points on the ranges of the scales being verified.
Indirect calibration is deemed to have greater reliability when compared to direct calibration, as this method will consider all the individual variables in the functionality of the machine.
Certified test blocks are essential to ensure that the indirect hardness calibration is accurate and traceable.

Hardness test blocks. Image Credit: ZwickRoell GmbH Co. KG
About ZwickRoell Group
The ZwickRoell Group is a leading, global supplier of materials and component testing systems. The company supplies both standard and tailor-made solutions for the most demanding requirements - in R&D, production, and quality assurance - across more than 20 industry sectors. Privately held, the company’s consistent focus on innovation and commitment to outstanding quality has supported its growth in markets worldwide. Additional information about the ZwickRoell Group may be found at: www.zwickroell.com

This information has been sourced, reviewed and adapted from materials provided by ZwickRoell GmbH Co. KG.
For more information on this source, please visit ZwickRoell GmbH Co. KG.